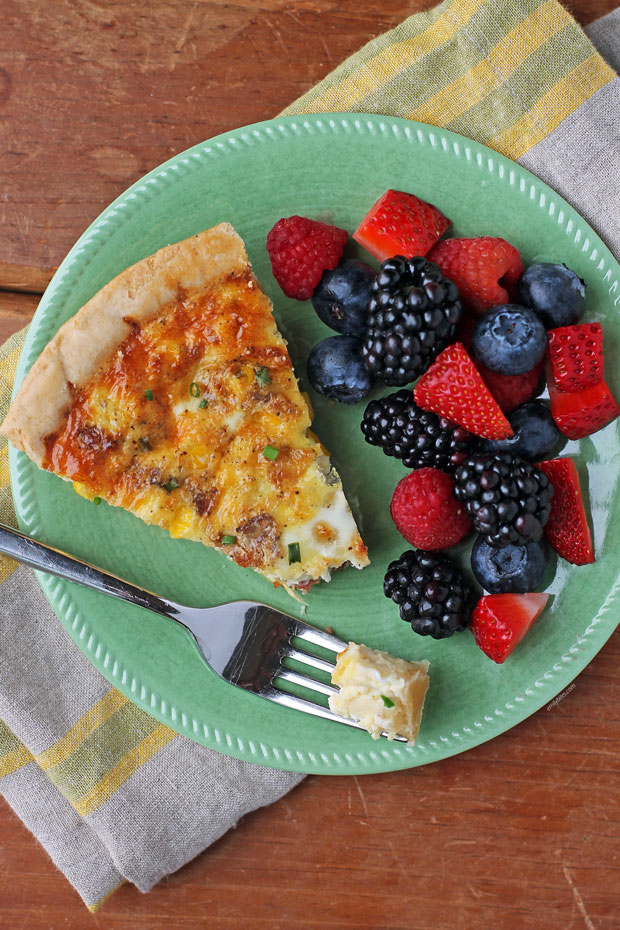
Bacon and Corn Quiche
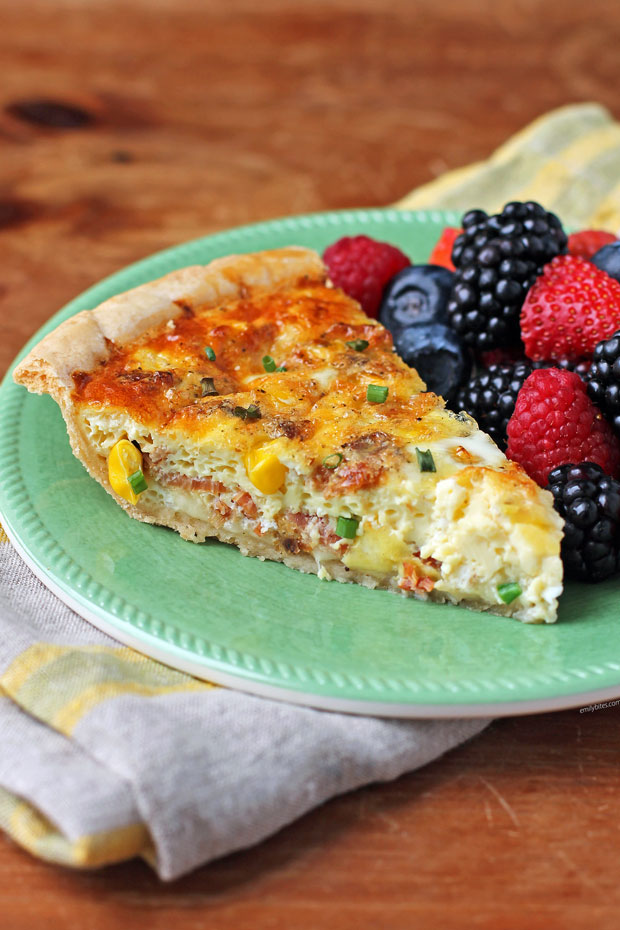
This easy Bacon and Corn Quiche makes a delicious breakfast or brunch using just a few ingredients that are easy to keep on hand! The prep for this recipe is quick and easy, but it’s a crowd-pleaser that works equally well for a fancy holiday brunch or to just make for a casual week of breakfasts. It uses a pre-made pie crust and frozen corn kernels, so it comes together quickly enough to serve anytime! I like to serve it with fruit at breakfast time or a side salad at brunch/lunch. The sweetness of the corn is perfect with the smoky, salty bacon and sharp cheddar cheese, and the flavors all come together in fluffy eggs and a flaky pie crust! Better still, a slice of this Bacon and Corn Quiche is just 189 calories or 5 WW Points (or 6 Points if following the diabetic Weight Watchers plan). To view your current WW Points for this recipe and track it in the WW app or site, click here!
Ingredient Notes
- Crust: I really like the frozen Pillsbury Regular Pie Crusts because they taste great in recipes and are pretty easy to find. If you use a different brand I recommend making sure to use a regular (not deep dish) crust.
- Corn: I used frozen corn kernels for this recipe because I always have them on hand in my freezer! If you have leftover fresh cooked corn or want to use drained canned corn I’m sure that would also work great!
- Bacon: I always use center cut bacon because it’s just a leaner cut of regular bacon and tastes delicious while being a bit lighter. I really like the Oscar Mayer brand, it is consistently good!
- Shredded Cheese: I used 2% milk sharp cheddar in this recipe because I think it goes well with bacon and corn, but feel free to change it up if you have different cheeses on hand!
More Tasty Breakfast Recipes
Looking for more tasty lightened up breakfast recipes? Check out my Goat Cheese Prosciutto Quiche, Bacon Broccoli Quiche, Ham and Cheese Omelet Roll, Pineapple Upside Down Baked Oatmeal Singles, Three Cheese Broccoli Brunch Bake, Banana Blueberry Muffins, Sausage and Pepper Egg Bake, Ultimate Tater Tot Breakfast Casserole, Sausage Apple Cheddar Frittata, Ham and Cheese Egg Cups, Chocolate Mocha Baked Oatmeal Singles, Ham and Cheese Hash Brown Quiche, and many more in the Breakfast section of my recipe index!
Bacon and Corn Quiche
Ingredients
- 4 slices center cut bacon, I use Oscar Mayer
- 9 inch frozen pie crust, regular, not deep-dish (I use Pillsbury)
- 3 oz shredded 2% milk sharp cheddar cheese
- 1 cup frozen corn kernels
- 4 large eggs
- ¾ cup skim milk
- ½ teaspoon salt
- ¼ teaspoon black pepper
- 1 teaspoon chopped fresh chives
Instructions
- Pre-heat the oven to 425 degrees. Line a heavy baking sheet with aluminum foil and set aside.
- Cook the bacon according to package directions. Allow to drain on paper towels and then chop or crumble into smaller pieces.
- Place the frozen pie crust on the baking sheet and use strips of aluminum foil to loosely cover the outside edges of the crust. Since the outer edges won’t be covered with filling, you do this so that they won’t brown too quickly.
- Sprinkle the shredded cheese across the bottom of the pie crust and top with the bacon pieces. Sprinkle the corn kernels on top of the cheese and bacon in the pie crust.
- Place the eggs, milk, salt, pepper, and chives into a mixing bowl and whisk together until beaten. Pour this mixture over the other ingredients in the pie crust.
- Place the baking sheet with the quiche on it into the oven and bake for 15 minutes at 425. Remove from the oven and reduce the heat to 350 degrees. Remove the strips of aluminum foil from the edges of the pie crust and place back in the oven. Bake for another 25-30 minutes or until an inserted toothpick comes out clean. Allow to cool for a few minutes before slicing and serving. Cut into 8 slices and serve.
Notes
189 calories, 15 g carbs, 3 g sugars, 11 g fat, 5 g saturated fat, 9 g protein, 0 g fiber, 263 mg sodium (from myfitnesspal.com) Weight Watchers Points Plus:
5 per (1 slice = 1/8th of the quiche) serving (P+ calculated using the recipe builder on weightwatchers.com)
I had all the ingredients so I just made this recipe. It’s delicious! I will absolutely make it again. It makes for a great lunch option as well as for breakfast!
Would love to try making this, but am a little confused. Step 3, “Place the frozen pie crust on the baking sheet” Is that the same baking sheet I made the bacon on in step 1? OR is this a round pie baking dish? Also, in step 6, wasn’t sure what “Place the baking sheet with the quiche on it into the oven.” Place the pie plate on top of a baking sheet and then in oven? Sorry for my confusion, I’m still new to cooking and am not very intuitive. The picture of the finished product looks like it’s pie shaped, but don’t see what step that happens.
Hi Carrie, the frozen pie crust I recommend using comes already shaped in an aluminum pie plate that you keep it in. I recommend placing that pie crust in the tin onto a baking sheet in case of any overflow from the quiche while baking. You’ll want to pre-heat them together so that the baking sheet will heat up slowly and is less likely to warp while baking.
If you made your bacon using a baking sheet instead of in a pan, you can use the same one if you wish, you’ll just want to clean it/wipe it down first and line it with foil.
I hope that eliminates any confusion and that you enjoy the quiche!
Thank you so much for sharing this amazing recipe! It looks absolutely delicious, and I can’t wait to try it out. Your instructions are clear and easy to follow, which makes it even more appealing. I’ll be sure to let you know how it turns out. Thanks again for sharing your culinary expertise!
The quiche is delicious, and since I’m on a diet, it’s perfect for me!
Just looking at it is making me hungry!
Perfect Recipe! These bacon and corn quiche are delicious. Thank you for sharing this recipe!
Perfect and Delicious Recipe from your’s End!
Have a great dinner and Thanks for such an inspiration!
I love how you explained this! Your ability to simplify the material while still being detailed is really impressive. I’m definitely going to apply these ideas to my work.
When you buy research chemicals online from us and need to get your parcel delivered quickly, we provide fast overnight
delivery to most major cities or – for more distant destinations
Fresh poppy pods are the seed pods that are harvested from the poppy flower. Poppies are known for their beautiful flowers, but it’s their seed pods that are of the most value. These pods contain the seeds for the next crop and, when dried, they are frequently used in floral arrangements and other decorative crafts. By using fresh poppy pods, you can take your art to the next level as it gives a natural and pleasant look to your creations.
Our focus on firearms and shooting related equipment allows us to buy in large quantities, and pass the savings to you. Everyone who works at Universalguns, from the owners to the shipping crew, are shooters first. We absolutely love what we do!
Our goal is to deliver quality care in a courteous, respectful, and compassionate manner. We hope you will allow us to care for you and strive to be the first and best choice of pharmaceutical products. Buy Saxenda weight loss.
Our journey began with a simple, irresistible love for Maine Coon kittens for sale. Today, we operate under the brand name “Adorable Claw”, proudly pitting ourselves as one of the credible and well-established breeders in the industry. At our core, we specialize in the sale of superior quality, pedigree Maine Coon kittens, distinguishing ourselves through our passion, commitment, and exceptional standards.
Suchen Sie nicht weiter als unter , Ihre Go-to-Quelle für Premium-Fälschungen, Führerscheine Kosten und IDs.
We live in a rapid world where the development of technology is faster than the creative development of mankind. This causes a rigid view of the world that leads to tunnel vision, a lot of misunderstanding, and problems. Buy magic mushrooms
Explore the picturesque tea gardens and learn about the tea-making process. You can even participate in tea picking during the harvest season.
Do you think this would be good as a Brittany without the crust??
Can you do this quiche crustless?
Can this quiche be frozen?